What’s in the box… week one

Lauren’s first week as a work-share CSA member

This week was exciting for a number of reasons.  The weather in Chicago has been absolutely perfect, so I took my first of what I hope will be many summer jogs on the lakefront. I put in my first shift pulling weeds as a work-share at Midnight Sun Farm in Grayslake, and the resulting CSA box fed me all week long.

Throughout the summer I hope to give you a peak into what’s in my CSA box and the resulting gastronomical feats I achieve each week.  

The overall goals are:

  • To not let anything rot and have to go in the compost
  • To not buy produce from the grocery store all summer
  • To get that healthy glow that can only come from eating multitudes of fresh, local, seasonal produce all summer long

In my box this week were:

  • salad mix
  • one head lettuce
  • one head curly endive
  • asparagus
  • Carola spring potatoes
  • pea shoots
  • Prize bok choi
  • mixed radishes

So, what became of this random box of green goodness?

I used the potatoes to make a German Potato Salad with some leftover bacon, and substituted fresh arugula from my friend Ann’s garden in place of parsley.  I discovered about three days ago that it’s really delicious for breakfast with melted cheese on top.

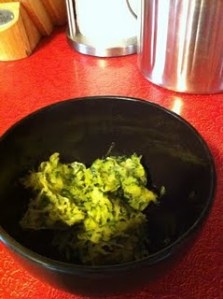
Pea shoots and bok choi went into this stir fry with some sauteed tofu and onions, soy sauce, a slash of red wine vinegar, and a little bit of H20.

My favorite meal of the week has to be the grilled asparagus with black forest ham and pinapple skewers.  Ok, so I know pineapple didn’t exactly come from a farm in North Central Illinois….. In my defense I bought it a week ago before I got my first box and it was on its last leg.  The whole package deal of this meal, combined with my first time grilling and a glass of Cabernet made for a lovely, lovely dinner.

Lots of salad is in store for tonight and tomorrow to use up the greens and radishes, and then we do it all over again…

Downsizing is hard.

Don’t mess with a woman’s counter space….

The past couple of weeks I’ve been going through a series of life changes.  Sometimes you have to give up a few things in order to grow, and part of my last few weeks has included a serious downsize back to apartment living.

While I can say for certain that I’m in a good place personally, perhaps the hardest part has been giving up my enormous chef’s kitchen for a 2′ x 4′ slab of Formica in my current abode.  While I have every confidence in my ability to cook in a small kitchen (proved, in part, by the mean apple cobbler you see here), I’ll admit that I got pretty accustomed to spreading out.

As Alton Brown has drilled into me, muti-taskers are key, and in a small kitchen this is all the more true.  So the things that I’ve chosen to take with me to the apartment are going to have maximum impact with a minimum footprint.  If ever faced with nuclear holocaust, or a downsize of major proportions, these are the things I would (and did) take with me.

Lauren’s must-haves for a happy kitchen of any size:

  1. An awesome wooden spoon, spatula, and scraper.  Don’t skimp on quality here; break the bank and get the best.
  2. Corning ware.  My set was a wedding gift to my parents in 1975.  Oven, microwave and dishwasher safe (not that I have one of those anymore).  Plus they have lids, so you don’t need extra tupperware.  You can use them for baking, too!

  3. A fantastic mixing bowl.  Do I really have to justify this?
  4. Chef’s knife.  No meal is made without it.  Again, don’t skimp here; get the best and keep it sharp.
  5. A soup pot, a skillet, and a sauce pan.  If they are good ones, you only need one of each.  Will Calphalon pay me if I plug them as my brand of choice?
  6. A french press. The coffee tastes better, and it’s small enough to store in the cupboard.
  7. My vintage, 1st edition Betty Crocker Cookbook.  When times get tough, my mantra is always that Betty knows best.

Stocking up and making ready

Since December 2, I’ve been living the fantastic life of a housewife.  Working occasionally, blogging frequently, and cooking constantly.  Today, that all changes as I go back to my typical 60-hour work week.

I’m nervous.

When I get nervous, I prepare by cooking lots of food.  That way, even if nothing goes according to plan, at least I’ve got dinner.  It’s winter, so, naturally that means lots of soup.  Lots and lots of soup.  My hope is that these two beauties will last all week and next for dinners.


That’s Hearty Black Bean Slow-Cooker soup on the left, and Winter Ham and Beans on the right.  I’ll get you those recipes later in the week.

I was hoping to get a third pot going too, but it wasn’t in the cards today.

That’s right; I said it: we have three crock pots.  When it comes to crock pots, you can’t just have one.  Plus, we have a chili cookout every Halloween and so all those slow cookers come in quite handy.

Marigold Merriment and a brand new look.

First, let’s point out the elephant in the room…. One Crafty Lady got herself a facelift!  I’m migrating all of my miscellaneous and antiquated blogs over to one superfine megablog, and it’s all right here.  Some things will be slower to join the party…. for example, Travelpod does not allow me to export my posts so I’ll be slowly, and painfully, copy-pasting them here over time.  Other than that, I shall introduce you to One Crafty Lady 2.0 with some thoughts on marigolds.

Marigolds are awesome.

They are pretty, easy to grow from seed (read: don’t splurge on mini-plants at the nursery, because they are seriously that easy to grow from seed), and hearty.  Another fabulous trait of the marigold is how easy it is to preserve seeds to grow next year.

You should only have to buy a seed packet of marigolds ONCE.

Or, just get some from your neighbor’s marigold plants.

Once the plant flowers and the buds dry out they should be easy to pick off of the stem. Inside that nondescript dried up flower is a magical seed pod.  Just give a little tug to the dried petals, and out come the seeds.

Lots of seeds.

One pot of marigolds will yield you about 4 pots of seeds for the next year, which is why it’s ok to pluck a dried up marigold out of your neighbor’s flower pot….

Big pointer:

Just make sure that you store those seeds in a paper envelope (not a plastic baggy) in a cool, dry place for the winter.

Fudge pops make home improvement palatable

My co-workers asked me what I was doing for the 4th of July weekend….

Co-workers: “What are you doing for the 4th of July?”
Me: “Digging rocks out of my backyard.”
Co-workers: “Really? For five days?”
Me: “Yes”
When I bought a charming little bungalow, the backyard was shrouded by a blanket of white. When the snow melted, I was greeted by stumps, fountains (seriously), underground hoses (for irrigation, duh), and lots and lots of rocks.
In the middle of the yard.
Lots of rocks.
So two solid months of rock digging led up to a very special weekend, when the last of the rocks were finally cleared out, and, in it’s place, SOD!
As a part of this transformation, I was also forced to finally address the five or so relatively big maple tree stumps in the way.
The point is, working outside in the pursuit of home improvement is hard, and I can think of few better excuses for a homemade fudgy pop.

Homemade Fudgy Pops

Ingredients:
  • 1/2 C. sugar
  • 2 TB cornstarch
  • 2 TB cocoa powder
  • 2 1/2 C. milk
  • 1 TB butter
  • 1 tsp. vanilla
Directions:
  1. In a small saucepan, combine sugar, cornstarch, cocoa and milk
  2. Heat on medium, stirring constantly, until boiling and thick
  3. Remove from heat and add butter and vanilla
  4. Pour into popsicle mold and freeze until firm
* Pro-Tip: to get them out of the mold, pour a bit of running hot water over the mold to let the plastic expand and release the fudgy goodness.

Kitchen organization and visions of zucchini muffins

I’m a bit of a freak when it comes to kitchen organization. Take for example this shelf in the baking cupboard above. Yes, each item is poured into a clear glass container, and yes, Each clear glass container is labeled with a labelmaker.

What goes where is also exceedingly important. Everything has to be in a cupboard that’s accessible to what you’re doing. Cups next to the fridge, potholders in the drawer next to the stove, plastic baggies reachable with one hand to where I make sandwiches in the morning.
It took me five years to perfect the old apartment kitchen, and this one is twice as big with three times as many cupboards. I’ve rearranged twice already (much to Nancy’s dismay), and I just finished the third installment. Admittedly, it’s putting me in the mood to bake…

Record heat is the talk of the day on the Book of Faces, and all I can think about is hot, delicious zucchini muffins.
 
The thing is, there’s a delightfully cool breeze coming through the kitchen window, it’s reaching noon-time and still 74 out, and so while it seems crazy to voluntarily heat my kitchen to 375-degrees on the purported hottest day in five years, this run-on sentence is trying to say that I’m going to do it anyway.
 
 
Who could refuse this already defrosted shredded zucchini from last summer’s bounty??

Zucchini Muffins

Ingredients:
  • 1/2 C. applesauce
  • 1/4 C mashed banana (applesauce and banana can be substituted for 2 eggs)
  • 2 C. sugar
  • 3 tsp. vanilla extract
  • 1 C. vegetable oil
  • 2 C. shredded zucchini, unpeeled, liquid squeezed out
  • 3 C. flour
  • 3/4 tsp. baking powder
  • 1 tsp. salt
  • 1 tsp. baking soda
  • 1 tsp. cinnamon
  • 1/2 C. chopped nuts (optional)
Directions:
  1. Preheat oven to 375-deg F. Whisk applesauce, banana (or egg), sugar, vanilla, and veg. oil together until well blended.
  2. Stir in drained zucchini. Add flour, baking powder, salt, soda, and cinnamon and mix until well blended.
  3. Fold in nuts, if desired.
  4. Turn into greased muffin tins and bake 18-25 minutes or until pastry pick comes out clean
** You can also cook the batter in a loaf pan to make a bread. In that case, bake 45 min-1 hour
Makes approximately 20 muffins