The Crock Pot (a.k.a. “Old Faithful”) makes tomato sauce

“Old Faithful”

I pseudo inherited my crock pot from my mother while foraging her basement on a Sunday trip to the suburbs.  This 1975 Sears “Crock Watcher” is older than me, but undoubtedly in better condition.

If the 70’s got anything right, it’s the slow cooker.  The idea that I can stick something in there at 6am before I leave for work, cover it  with liquid, and come home to a good smelling house AND dinner still boggles my mind, and I do it about every other week…. sometimes more, sometimes less.

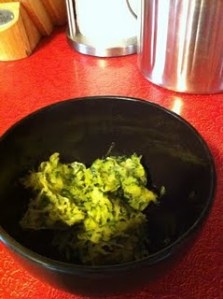
Lately Old Faithful has been working overtime cranking out tomato sauce to stock up for the winter.  I bought 30 pounds of tomatoes from Midnight Sun Farm over the course of three weeks and have made tomato processing an obsession.

After an epic fail on the stove of sauce that was way more juicy than saucy, I revamped my approach.  Ok, it wasn’t entirely a fail, just a misunderstanding between me and the tomatoes, really.  After consulting mom (my go-to for kitchen mishaps) and my friend and fellow canning-enthusiast Toni Camphouse, I opted to try the slow cooker approach, and I’m never turning back.

Homemade Tomato Sauce

Ingredients

  • Tomatoes (duh)
  • Salt
  • Lemon Juice
  • Canning jars and lids

Core and quarter tomatoes and fill your slow cooker.  Prop the lid open with a spoon and cook all day on low.

The great tomato stock-up begins…

Using a blender or immersion blender, puree the tomatoes until smooth.  Pre-fill canning jars with salt and lemon juice.  For quart jars, use 2TB lemon juice and 1 tsp. salt*.  Half those if using pint jars.  Add sauce to jars and fill to 1/2″ from the top.  Cover with lid and band, twisting until hand tight.

Add jars to water bath (making sure the water covers the jars by at least 1 inch). Once water is boiling, reduce heat to a rolling boil and set time for 30-40 minutes (30 for pint jars, 40 for quart).  Remove from water bath and set on a level surface to cool (don’t shake the jars).  Store for as long as you like, or about a year, whichever comes first.

* You can add seasoning to your sauce before you jar it, but I prefer to do it once I open the jar so the herbs and spices are fresher.

Summer draws to a close

Fall 2011 at Portage Park Farmer’s Market | Photo by Kelly Rose

We’re on the heels of my favorite season.  The mornings now have a bite in the air, fashion scarves and sweaters are becoming imperative, and everything around me is turning into orange-y and amber hues.  Though I’m a California girl at heart, I’ve lived in the Midwest for almost 25 years.  The one thing about living here that has kept me from continually accosting my parents for moving us across the country is the leaves.  Well, they have leaves in California, but they don’t turn orange and gold and burgundy.

Some people live life with rose-colored glasses; my glasses are burgundy.

Plus, the idea of not sweating profusely every time I go somewhere is highly appealing to me.

The farmer’s market is becoming particularly bountiful, and though it’s sad to see summer squash and tomatoes go out of my life, the beginning of fall means it’s “squirrel time”.  What I mean is, I’m trying to make time to take everything that still just barely at it’s peak of freshness and dry it, freeze it or can it for the winter.

I’ve always wanted to make an attempt to preserve enough produce to make it through the winter without buying a shriveled up zucchini that was grown in the middle of Mexico and shipped to my local store on a refrigerator truck.

Wishful thinking…

I know that this isn’t the year for me to make this happen full stop, but nonetheless I’ve managed to buy and can or freeze 25 pounds of  tomatoes, pickle a bunch of beets, blanch and freeze broccoli, eggplant, and green beans, and there is a batch of crispy squash chips in the oven as I type.  I got a really big squash in my CSA box last week, was told it would be the last one, and, having eaten one squash too many, this is what I chose to do with it:

Squash Chips

Ingredients:

  • Zucchini or summer squash, thinly sliced and dried on a paper towel
  • Olive oil
  • Salt

Line a baking sheet (or two) with parchment paper or a silicone baking mat (spraying it with cooking spray works fine too).  Arrange the squash slices in a single layer and coat with olive oil using a pastry brush.  Sprinkle with a modest amount of salt and bake at 275-F for a LONG time (several hours).  When they are firm and crispy, they’re done.

A great substitute for potato chips, use these chips up in about three days, stored in a plastic bag or wrapped in a tea towel

Downsizing is hard.

Don’t mess with a woman’s counter space….

The past couple of weeks I’ve been going through a series of life changes.  Sometimes you have to give up a few things in order to grow, and part of my last few weeks has included a serious downsize back to apartment living.

While I can say for certain that I’m in a good place personally, perhaps the hardest part has been giving up my enormous chef’s kitchen for a 2′ x 4′ slab of Formica in my current abode.  While I have every confidence in my ability to cook in a small kitchen (proved, in part, by the mean apple cobbler you see here), I’ll admit that I got pretty accustomed to spreading out.

As Alton Brown has drilled into me, muti-taskers are key, and in a small kitchen this is all the more true.  So the things that I’ve chosen to take with me to the apartment are going to have maximum impact with a minimum footprint.  If ever faced with nuclear holocaust, or a downsize of major proportions, these are the things I would (and did) take with me.

Lauren’s must-haves for a happy kitchen of any size:

  1. An awesome wooden spoon, spatula, and scraper.  Don’t skimp on quality here; break the bank and get the best.
  2. Corning ware.  My set was a wedding gift to my parents in 1975.  Oven, microwave and dishwasher safe (not that I have one of those anymore).  Plus they have lids, so you don’t need extra tupperware.  You can use them for baking, too!

  3. A fantastic mixing bowl.  Do I really have to justify this?
  4. Chef’s knife.  No meal is made without it.  Again, don’t skimp here; get the best and keep it sharp.
  5. A soup pot, a skillet, and a sauce pan.  If they are good ones, you only need one of each.  Will Calphalon pay me if I plug them as my brand of choice?
  6. A french press. The coffee tastes better, and it’s small enough to store in the cupboard.
  7. My vintage, 1st edition Betty Crocker Cookbook.  When times get tough, my mantra is always that Betty knows best.

Scones, glorious scones

If I were stranded on a deserted island, and I could bring two things, one of them would be my recipe for Trail Mix Scones.  Now, I realize that there is not an overabundance of brown sugar and pumpkin seeds on deserted islands… I am simply trying to exemplify the importance of this scone in my life.

In fact, baking scones is one of the things I do best, and this quality makes it into every biography I write.

So, it is with great joy that I present to you my cherished recipe for Trail Mix Scones (although, it does make me a little nervous, since I often bring these to impress people at parties).  I originally came across the recipe in the Tribune several years ago when they did a special publication of favorite reader dishes from restaurants around Chicago.  The “Take a Hike Scone” is a schmorgeshborg of ingredients thrown together by the owner of the Bleeding Heart Bakery.  The result: magic.  I loved it instantly because it’s a vegan baking recipe that actually works and even tastes good (I was vegan at the time, and baking is perhaps the biggest challenge as a vegan chef) .

Since that time I’ve modified the recipe to my own liking, with one of the biggest differences being that I make it as a drop scone.  I mean, sure, you could be all fancy, roll out the dough, and cut it in triangles before baking, but honestly, skipping that step doesn’t affect the taste or texture one bit.  Needless to say, these beauties are a staple in our household, and dried cranberries are ALWAYS on the shopping list.

Trail Mix Scones

Ingredients:

  • 1 C. (2 sticks) salted butter, softened to room temperature
  • 2-1/2 C. all-purpose, unbleached flour
  • 2/3 C. dark brown sugar
  • 2 tsp. cinnamon
  • 2 tsp. baking powder
  • 1-1/2 C. old fashioned rolled oats
  • 3/4 C. dried cranberries
  • 1/4 C. raw pumpkin seeds
  • 4 TB whole flaxseeds
  • 1-1/4 C. soymilk, rice milk or organic non-fat milk

Directions:

Preheat oven to 375-deg F. Using the dough hook, mix together flour, brown sugar, cinnamon, baking powder, soda, and oats in an electric stand mixer on low-medium speed (*Note: the whole recipe can be mixed by hand, but your wrist will be mighty sore by the end).

Cut the butter into approximately 1-TB chunks and add to mixer while it’s running, until pea-sized chunks are left.  Add dried fruit, pumpkin seeds, and flaxseeds to mixture (*Note: I’ve tried tons of variations…. you can add nuts, coconut, sesame seeds, chocolate chips, raisins… the list goes on, but cranberries, pumpkin seeds and flaxseed is by far my favorite combination).  Add milk and mix until incorporated (dough will by slightly wet).

Scoop out approximately 1/4-C. of mix onto greased cookie sheets with two spoons.  Bake 25-28 minutes and transfer to cooling rack for as long as you can stand it.  Makes 12-15 scones, best enjoyed with a glass of milk or a bitter cup of Joe.

Words of Wisdom:

  • Don’t spend the money on fancy packaging and buy things like Craisins.  Visit your local mercado or fruit market and find the bulk section.  You can get the extras for this recipe for a third of the price this way.
  • You can use cooking spray to grease your cookie sheet, or parchment paper, but I’m not too keen on waste and cooking spray doesn’t cut it for baking since I switched over from Pam to a DIY Misto sprayer.  Best bet: invest in an expensive tub of non-hydrogenated vegetable shortening.  It rocks for greasing baking sheets, and has lasted me a year so far.

Epic baking fail

As much as I enjoy that you believe me to be the queen of domesticity (…because, you do, right???), today I’m zero for two.

Here you see that I’ve overstuffed my slightly-smaller-than-standard loaf pan this morning with a delicious cranberry bread for Thanksgiving.  The lovely char smell now resonating through the house from the globs on the bottom of the stove are making me feel real good about myself.  I guess we’ll just have to eat this one ourselves and make another for “company”.  In spite of this miserable failure, this IS a great recipe:

Lauren’s Mom’s Cranberry Bread

Ingredients:

2 C. flour

1 C. sugar

1/2 tsp. each of baking powder, baking soda, and salt

3/4 C. orange juice

2 TB melted butter

1 C. cranberries (frozen, halved, and seeds rinsed out)

Directions:

Preheat the oven to 350-deg F.  Mix all dry ingredients together in a large bowl. Add orange juice to melted butter and add to dry ingredients until well incorporated. Fold in cranberries (add chopped walnuts to batter, if desired). Turn into prepared loaf pan and bake at 350-deg F for 60 minutes. This loaf freezes really well.

Add to this failure my previous pat of on the back in processing our jack-o-lantern to make canned pumpkin for homemade breads and pies.  Apparently, the work schedule these days isn’t as conducive to pumpkin processing as it once was, and my brilliant idea to store the roasted inners at room temperature would (five days later) present itself as fermented, white-ish pumpkin goo.  I’ll spare you photo documentation of this, and instead offer you the plan B for “homemade” pumpkin pie.

Even Master Composters kill their worms

Through a series of unfortunate events, I’ve endured a couple casualties over the past two weeks.  I’ve been worm-sitting for the Glenwood Sunday Market, and am sad to report that not everyone has enjoyed their stay with me…

In short, I killed them.

Ok, well, let me preface that with the fact that many of them are doing just fine, but I crammed them all in close quarters knowing full well that they were too crowded, and a few days later there were dried runaways on the countertop and a not-so-nice smell coming from the bin.

These worms are too crowded, and so were mine.

Then Nancy put the bin outside in really hot weather (she does not have an appreciation for smelly worms).

Then it rained.

All I have to say is, that Darwin guy was pretty smart with the whole natural selection theory, and bravo to the survivors who weathered those storms and are still alive and kickin’.

Moral of this story:

Even Master Composters screw up and kill worms sometimes.  The only difference is that we know why we killed them.  And we’re good at making worm babies to make up for the loss.

Kitchen organization and visions of zucchini muffins

I’m a bit of a freak when it comes to kitchen organization. Take for example this shelf in the baking cupboard above. Yes, each item is poured into a clear glass container, and yes, Each clear glass container is labeled with a labelmaker.

What goes where is also exceedingly important. Everything has to be in a cupboard that’s accessible to what you’re doing. Cups next to the fridge, potholders in the drawer next to the stove, plastic baggies reachable with one hand to where I make sandwiches in the morning.
It took me five years to perfect the old apartment kitchen, and this one is twice as big with three times as many cupboards. I’ve rearranged twice already (much to Nancy’s dismay), and I just finished the third installment. Admittedly, it’s putting me in the mood to bake…

Record heat is the talk of the day on the Book of Faces, and all I can think about is hot, delicious zucchini muffins.
 
The thing is, there’s a delightfully cool breeze coming through the kitchen window, it’s reaching noon-time and still 74 out, and so while it seems crazy to voluntarily heat my kitchen to 375-degrees on the purported hottest day in five years, this run-on sentence is trying to say that I’m going to do it anyway.
 
 
Who could refuse this already defrosted shredded zucchini from last summer’s bounty??

Zucchini Muffins

Ingredients:
  • 1/2 C. applesauce
  • 1/4 C mashed banana (applesauce and banana can be substituted for 2 eggs)
  • 2 C. sugar
  • 3 tsp. vanilla extract
  • 1 C. vegetable oil
  • 2 C. shredded zucchini, unpeeled, liquid squeezed out
  • 3 C. flour
  • 3/4 tsp. baking powder
  • 1 tsp. salt
  • 1 tsp. baking soda
  • 1 tsp. cinnamon
  • 1/2 C. chopped nuts (optional)
Directions:
  1. Preheat oven to 375-deg F. Whisk applesauce, banana (or egg), sugar, vanilla, and veg. oil together until well blended.
  2. Stir in drained zucchini. Add flour, baking powder, salt, soda, and cinnamon and mix until well blended.
  3. Fold in nuts, if desired.
  4. Turn into greased muffin tins and bake 18-25 minutes or until pastry pick comes out clean
** You can also cook the batter in a loaf pan to make a bread. In that case, bake 45 min-1 hour
Makes approximately 20 muffins