Kitchen organization and visions of zucchini muffins

I’m a bit of a freak when it comes to kitchen organization. Take for example this shelf in the baking cupboard above. Yes, each item is poured into a clear glass container, and yes, Each clear glass container is labeled with a labelmaker.

What goes where is also exceedingly important. Everything has to be in a cupboard that’s accessible to what you’re doing. Cups next to the fridge, potholders in the drawer next to the stove, plastic baggies reachable with one hand to where I make sandwiches in the morning.
It took me five years to perfect the old apartment kitchen, and this one is twice as big with three times as many cupboards. I’ve rearranged twice already (much to Nancy’s dismay), and I just finished the third installment. Admittedly, it’s putting me in the mood to bake…

Record heat is the talk of the day on the Book of Faces, and all I can think about is hot, delicious zucchini muffins.
 
The thing is, there’s a delightfully cool breeze coming through the kitchen window, it’s reaching noon-time and still 74 out, and so while it seems crazy to voluntarily heat my kitchen to 375-degrees on the purported hottest day in five years, this run-on sentence is trying to say that I’m going to do it anyway.
 
 
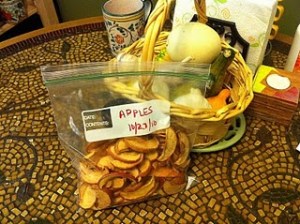
Who could refuse this already defrosted shredded zucchini from last summer’s bounty??

Zucchini Muffins

Ingredients:
  • 1/2 C. applesauce
  • 1/4 C mashed banana (applesauce and banana can be substituted for 2 eggs)
  • 2 C. sugar
  • 3 tsp. vanilla extract
  • 1 C. vegetable oil
  • 2 C. shredded zucchini, unpeeled, liquid squeezed out
  • 3 C. flour
  • 3/4 tsp. baking powder
  • 1 tsp. salt
  • 1 tsp. baking soda
  • 1 tsp. cinnamon
  • 1/2 C. chopped nuts (optional)
Directions:
  1. Preheat oven to 375-deg F. Whisk applesauce, banana (or egg), sugar, vanilla, and veg. oil together until well blended.
  2. Stir in drained zucchini. Add flour, baking powder, salt, soda, and cinnamon and mix until well blended.
  3. Fold in nuts, if desired.
  4. Turn into greased muffin tins and bake 18-25 minutes or until pastry pick comes out clean
** You can also cook the batter in a loaf pan to make a bread. In that case, bake 45 min-1 hour
Makes approximately 20 muffins

Pass the syrup

I get a hankering for pancakes about every other week. A peculiar pancake craving came over me yesterday morning and, alas, there was no syrup in the pantry. Channeling my inner Better Crocker I converted the logic of a simple syrup to brown sugar. I could not tell the difference, and in fact, I may save myself $7 for a 12 oz. bottle of maple syrup and make it this way all of the time…
Brown Sugar Pancake Syrup
1/2 cup of pressed brown sugar
1 tsp. cornstarch
1 cup hot water (not boiling)
Directions:
  1. Pour hot water into a small sauce pan containing brown sugar and cornstarch. Set heat to medium-high and whisk until sugar dissolves.
  2. Stir constantly until boiling.
  3. Continue to boil for 1-2 minutes, stirring constantly
  4. Pour into serving pitcher and enjoy hot or cooled.

WWLID: What would Laura Ingalls Do?

I’m still on a bit of a pioneer kick and as the wind whips against the window panes and the air turns colder, my thoughts are turning to winter, using up what precious fresh market produce I have left and making it last.
While I won’t have the burden of hiking through 6 feet of snow to shoot jack rabbits, I’d like to eat an apple in the middle of the winter and not pay $2.39 a pound for a mealy, squishy, overall bad apple. At times like this, I ask myself, “What would Laura Ingalls do?” How would Laura eat an apple in February without one of those big box stores that now roam the high prairie in greater numbers than jack rabbits?
Thus, today was my first attempt at making dried fruit from scratch. No more mealy, squishy apples in winter; no more $4.00 for a bag of air and sulfur dioxide.
Want to try too? It was super easy!
Dried Fruit
Fruit of choice
1 lemon
12 cups water
Directions:
1. Wash or peel fruit, then pit or core if applicable. Slice larger fruits into thin slices.
2. Soak in lemon water for a few minutes while oven pre-heats at 90-150 deg-F
3. Line a baking sheet with parchment and place in a single layer, not touching.
4. Place trays in oven and wait several hours. Resist the urge to turn up the heat.

5. Let sit out over night (at least 12 hours) before packing away in air-tight containers

Say Pickles!

‘Tis pickling season! You know it’s come when you see mass quantities of Ball jars on sale everywhere. How fortunate are those who have such an overabundance of home-grown vegetables that the only way to deal with them is to pickle and can them? With fresh inspiration from the edu-tent at the Glenwood Sunday Market, and the fortuitous acquisition of a bounty of cucumbers (from a location which I wish not to disclose at this juncture…), I shall pickle.
After making a seriously good batch of refrigerator pickles (bread and butter, of course), I’m left with a sinking feeling. Do I put them in a hot water bath until the jar lids make that popping sound? Do I simply put on the lid and store in the fridge? Dear me, I can’t remember! I choose hot water bath. However, after noticing a slight sediment that has formed in my pickle jars, and confirmation from GSM’s pickling expert Toni that they needn’t be hot water bathed, I have serious regrets. I hope that six months from now, when I crack open that jar in the middle of a Chicago blizzard, that that my dear pickles that tasted so yummy this morning don’t disappoint…. or give me a case of botchulism.
Want to try it yourself?
Easy Refrigerator Bread and Butter Pickles (courtesy of grouprecipes.com)
8 small pickling cucumbers, washed (not peeled), and very thinly sliced
1 medium onion, halved and thinly sliced
1 cup apple cider vinegar
3/4 cup sugar
4-1/2 tsp kosher salt
2 tsp mustard seeds
1/2 tsp dry mustard
1/2 tsp turmeric
1/2 tsp crushed dry red pepper flakes
1/2 celery seed (in my case, optional)
Directions:
1-Combine all ingredients in a soup pot and heat to boiling, stirring occasionally

2-Boil one minute, stirring frequently
3-Pour mixture into a large bowl, cool to room temperature
4-Cover and chill overnight before serving
5-Spoon into jars with tight fitting lids and refrigerate for up to four weeks…. (jury is still out whether or not you can use hot water bath to extend shelf life and seal jars. I’ll let y’all know when I crack them open in a couple months).

Ode to the Vending Machine


Dear vending machine,

I think it’s time that we called it quits. It’s not you; it’s me. We just aren’t meant for one another. I thought maybe we could just be friends, but really, I think it’s best if we make it a clean break. Please do not call or write. I’m not good for you, and clearly you are not good for me. I’d prefer it if you left the building entirely, but it seems as though we are going to have to learn to work together as professionals and not as partners. I hope that this doesn’t cause you as much pain as it causes me.

Kind regards,
Lauren

Churning day is highly overrated


I have a serious desire to milk a cow. With no room for a cow pasture in my yard (and the likelihood of serious backfire from my landlady), I’m at the disposal of the back wall of my local grocery store. However, with fresh inspiration from the Learn and Grow tent at the Glenwood Sunday Market in tow, I figured if I can’t milk a cow I can at least enjoy the old fashioned joys of making my own supplementary dairy products: butter, yogurt and cheese.

Operation: butter
Status: fail

Either Laura Ingalls was extremely patient AND buff, or I did something wrong. I was meticulous in my choice of half and half (pasteurized, not ultra pasteurized), waited until the cream reached 72 degrees, poured into a mason jar and shook. and shook. And got tired and put it in the kitchen aid mixer. Fifteen minutes later and a seriously hot motor on my mixer and although little butter chunklets did form I simply can’t imagine that 1-1/2 cups of cream only yields a teaspoon of butter. I am defeated. But not discouraged! I shall live to churn another day.